
Sự kết hợp giữa VueJS và Laravel 5.4 là một việc rất thú vị và giúp cho các lập trình viên dễ dàng xây dựng các dự án cho công ty. Nay mình chia sẻ với mọi người tạo template vuejs và kết hợp với Laravel để sao này chúng ta có thể dễ quản lý các bố cục của website và mở rộng hệ thống website một cách dễ dàng
Để làm được bài hướng dẫn này bạn xem lại bài Tạo ứng dụng Laravel 5.4 kết hợp với Vuejs để có thể hiểu rõ hơn về các tạo project và cài đặt các thư viện cho Vuejs trong Laravel nhé!
Đầu tiên bạn cài download project laravel 5.4 về :
composer create-project --prefer-dist laravel/laravel create-laravel-vuejs "5.4.*"
Sau khi bạn tải về rồi bạn gõ cho mình câu lệnh: npm install , để cài đặt các thư viện cần thiết của laravel nhé, bên cạnh đó bạn cần cài đặt các thư viện cho vuejs bằng câu lệnh sau:
npm install --save-dev vue-axios vue-loader vue-router vue-template-compiler
Các bạn có thể lên trang vuejs để tìm hiểu các các thư viện của vuejs nhé và khi các bạn cài đặt các gối thư viện xong bạn có thể nhìn thấy các thư viện bạn vừa cài đặt trong file package.json có một đoạn code như sau:
  "devDependencies": {
    "axios": "^0.16.2",
    "bootstrap-sass": "^3.3.7",
    "cross-env": "^5.0.1",
    "jquery": "^3.1.1",
    "laravel-mix": "^1.0",
    "lodash": "^4.17.4",
    "vue": "^2.1.10",
    "vue-axios": "^2.0.2",
    "vue-loader": "^13.7.0",
    "vue-router": "^3.0.1",
    "vue-template-compiler": "^2.5.13"
  }
Đầu tiên mình sẽ tạo một layout tên là vuejs.blade.php trong thư mục Views của laravel, file vuejs.blade.php dùng để render các compent template mà mình muốn hiện thị nhé!
<!doctype html>
<html lang="{{ app()->getLocale() }}">
    <head>
        <meta charset="utf-8">
        <meta https-equiv="X-UA-Compatible" content="IE=edge">
        <meta name="viewport" content="width=device-width, initial-scale=1">

        <title>Laravel Vuejs</title>

        <!-- Fonts -->
      <link rel="stylesheet" type="text/css" href="{{ mix('css/app.css') }}">


    </head>
    <body>
        <div id="app-vuejs">

        </div>
    </body>
    <script type="text/javascript" src="{{ mix('js/app.js') }}"></script>
</html>
Các bạn chú ý ở đây mình có một id lên là app-vuejs dùng để khai báo để cho vuejs nhận biết được nơi muốn render ra nhé.
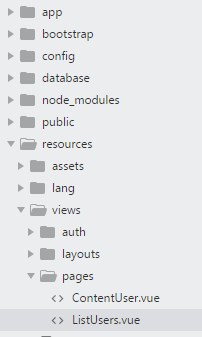
Tiếp theo mình sẽ tạo một folder pages nằm trong thư mực views,trong folder này mình tạo 2 file(ListUser.vue, ContentUser.vue). ListUser mình dùng dể hiển thị danh sách các users, còn ContentUser mình dùng dể hiển thị thông tin của user đó.
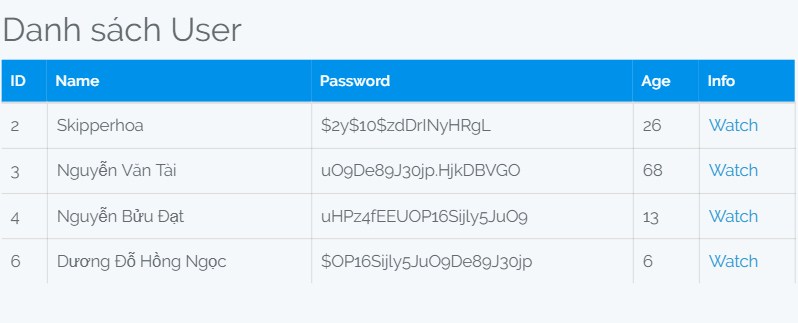
+ ListUsers.vue: ở file này mình có sử dụng Axios để get API json của mình về từ mockapi, sẽ trả về một mảng user và mình dùng mảng user đó hiển thị lên template của ListUsers.vue. Bạn sẽ thấy đoạn code v-for dữ liệu ở trong file nhé
<template>
    <div class="danhsach">
      <h2>{{title}}</h2>
        <table class="table">
            <thead>
              <tr>
                <th>ID</th>
                <th>Name</th>
                <th>Password</th>
                <th>Age</th>
                  <th>Info</th>
              </tr>
            </thead>
            <tbody>
                <tr v-for='data in datas'>
                  <td>{{data.id}}</td>
                  <td>{{data.name}}</td>
                  <td>{{data.password}}</td>
                  <td>{{data.age}}</td>
                  <td><router-link :to="{name:'ContentUser',params: { id: data.id }}">Watch</router-link></td>
                </tr>

            </tbody>
        </table>
    </div>
 </template>
 <script>
  export default{
      data(){
        return {
          title:"Danh sách User",
          datas:[]


        }
      },
      created:function(){
        this.danhsach_user();

      },
      methods:{
          danhsach_user(){
           this.axios.get('https://599f807effe73c0011b9fcc5.mockapi.io/api/user').then((response)=>{
             this.datas=response.data;
             console.log(response);
            });
          }

      }
  }


 </script>
 <style>
table{
    right: 0;
    left: 0;
    top: 0;
    margin: auto;
}
table tr th{
  background: rgba(0,145,234,1);
  padding: 10px;
  color: #fff;
}
table tr td{
  padding: 10px;
  border-right:1px solid rgba(0,0,0,0.1);
  font-size: 15px;
}


 </style>
Các bạn xem ở đoạn code bên trên có đoạn Watch, name:'ContentUser' và parames: chứ id của user , những thông tin này được thiết lập trong file router hồi mình sẽ nói cho các bạn hiểu.
+ ContentUser.vue: Trong file này mình sẽ lấy id của user và sử dụng Axios để get thông tin của user đó về lưu vào một mảng info, và mình sẽ truy xuất mảng info này ra để lấy thông tin của user. Các bạn chú ý ở đoạn code this.$router (chính là đoạn code để lấy id của user thông qua địa chỉ trên trình duyệt https://localhost:8000/content-usesr/2 , id ở đây chính là số 2. Và làm sao lấy được id đó và sao chúng ta truyền cho nó được bạn phải thiết lập trọng router để nó hiểu nhé.
<template>
	<div class="content">
		 <h2>{{title}}</h2>
        <table class="table">
            <thead>
              <tr>
                <th>ID</th>
                <th>Name</th>
                <th>Password</th>
                <th>Age</th>
              </tr>
            </thead>
            <tbody>
                <tr>
                  <td>{{info.id}}</td>
                  <td>{{info.name}}</td>
                  <td>{{info.password}}</td>
                  <td>{{info.age}}</td>
                </tr>
            </tbody>
        </table>


	</div>
</template>
<script>
	export default{
		data(){
			return {
				title:"Content User",
				info:[]
			}
		},
	created:function(){
        this.info_user();
      },
      methods:{
          info_user(){
            var route = this.$route;
          	var id = route.params.id;
          	//console.log(id+"");
           this.axios.get('https://599f807effe73c0011b9fcc5.mockapi.io/api/user/'+id).then((response)=>{
             this.info=response.data;
             console.log(response);
            });
          }
      }
	}


</script>
Phần này rất quan trọng, bạn hay tạo cho mình giống hình bên dưới nhé.
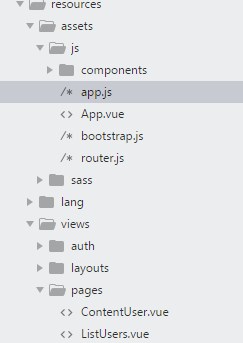
Bạn tạo cho mình file App.vue và file router.js
<template>
    <div class="container">
        <div>
            <transition name="fade">
                <router-view></router-view>
            </transition>
        </div>
    </div>
</template>

<style>
    .fade-enter-active, .fade-leave-active {
      transition: opacity .5s
    }
    .fade-enter, .fade-leave-active {
      opacity: 0
    }
</style>

<script>

    export default{
    }
Tiếp tục bạn tạo file router.js: trong file này bạn cần import các file nãy giờ mình tạo như(ListUsers.vue,ContentUser.vue) và bạn cần import các thư viện như (vue-router,vue-axios,axios) nửa nhé
import Vue from 'vue'
import VueRouter from 'vue-router'
import VueAxios from 'vue-axios';
import axios from 'axios';
Vue.use(VueAxios,axios);
import ListUsers from '../../views/pages/ListUsers.vue'
import ContentUser from '../../views/pages/ContentUser.vue'
Vue.use(VueRouter)

const router = new VueRouter({
    mode: 'history',
    routes: [
        { name:'ListUsers',path: '/app-vuejs', component: ListUsers},
        { name:'ContentUser',path:'/content-vuejs/:id',component: ContentUser}
    ]
})
//console.log(router)
export default router
Trong file router này bạn sẽ thấy mình thiết lập router gồm có: name tên của file, path:địa chỉ đến ứng dụng,có thể đi gắn thêm tham số bạn cần truyền, component:dùng để biết mình sử dụng component nào.
Tiếp theo bạn vào thư mục router của laravel bạn mờ file web.php lên và chỉnh sử như sau:
Route::get('/{any}', function () {
    return view('vuejs');
})->where(['any' => '.*']);
view: sẽ gọi vuejs.blade.php mà mình ban đầu đã tạo nhé các bạn, việc còn lại bạn chỉ cần chạy các câu lệnh bên dưới này để khởi động project của chúng ta nảy giờ làm nhé
npm run dev
php artisan serve
Sau khi bạn chạy xong bạn có thể gõ trên trình duyệt của các bạn như sau:https://localhost:8000/app-user (hiện thị danh sách các user), và bạn có thể xem được thông tin của từng user, chúc các bạn làm thành công!