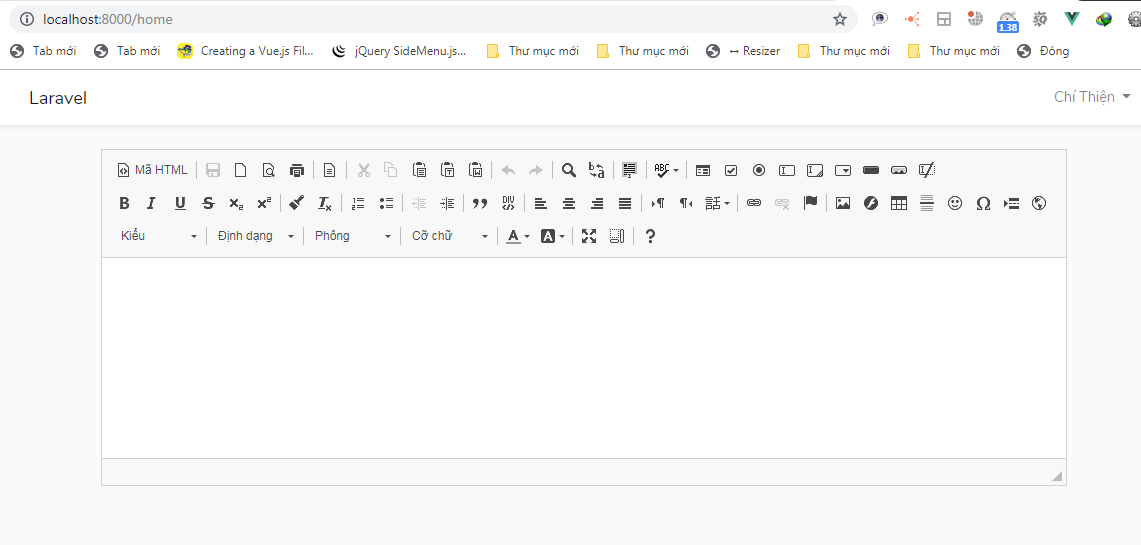
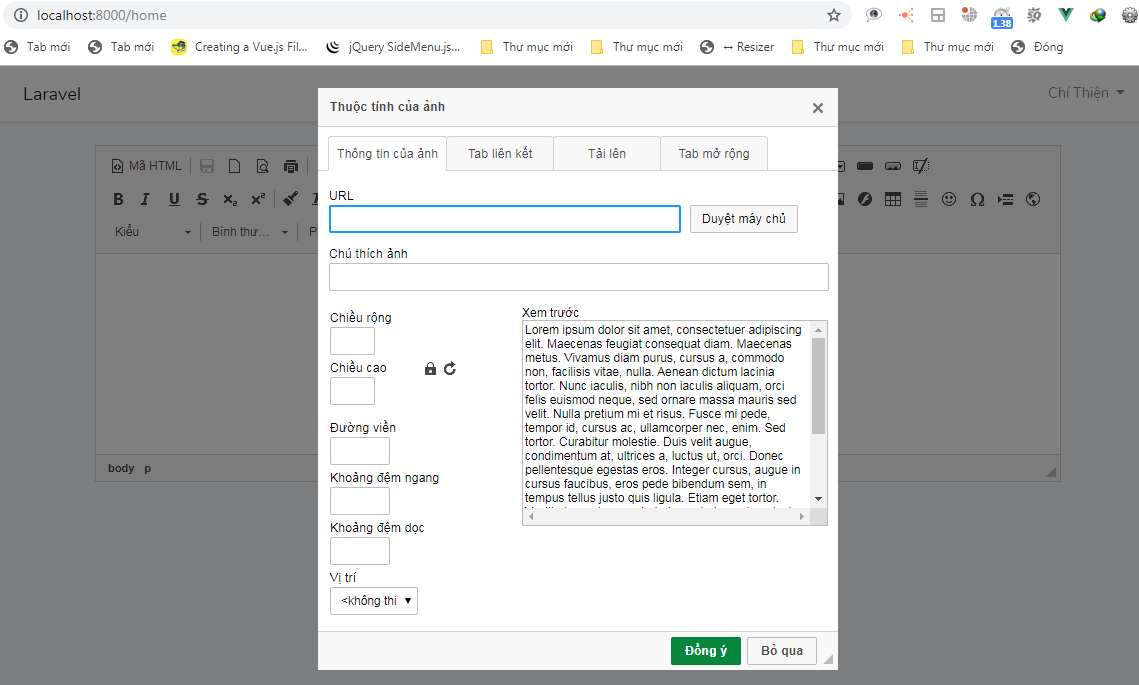
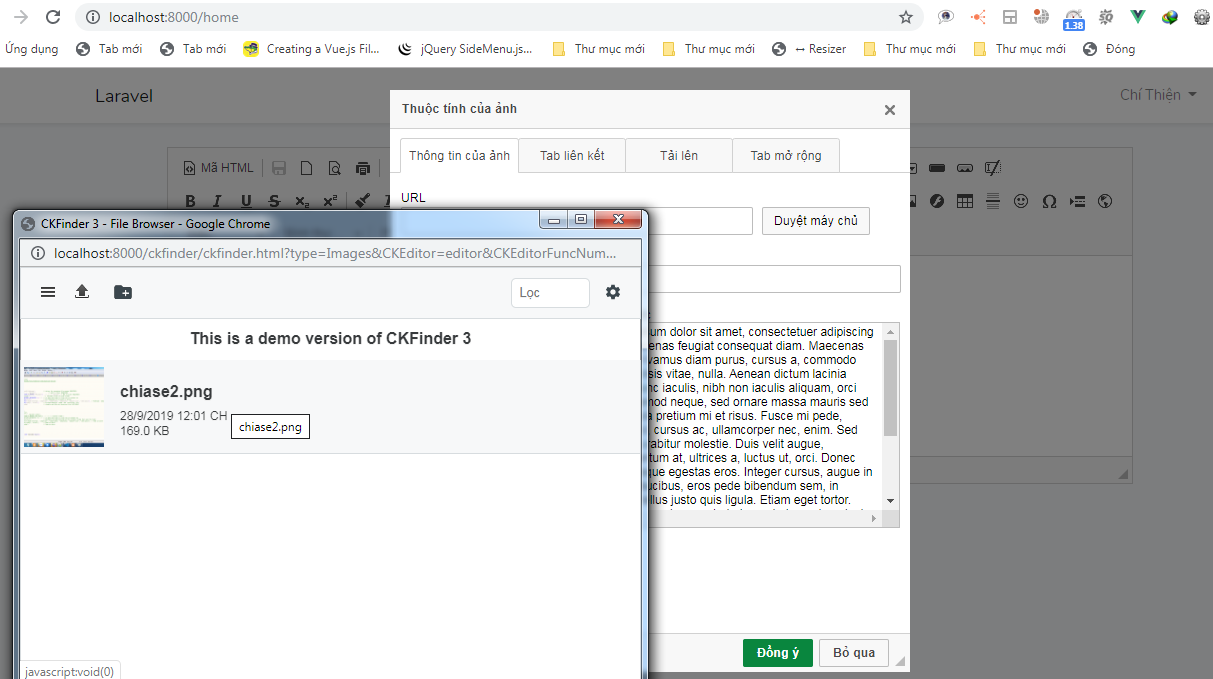
Thông thường ta cũng biết Ckeditor và Ckfinder thường được sử dụng nhiều trong website, dùng để biên soạn các bài viết cho website
Việt tích hợp Ckeditor & Ckfinder in Laravel & Vue.js cũng khá đơn giản, nó tương tự như ta tích hợp bình thường ckeditor & ckfinder bằng PHP, để biết thêm về sự kết hợp Laravel + Vue.js các bạn có thể xem thêm các bài viết sau:
- Create Template Vuejs and Laravel 5.4
- Multiple Subcategories in Laravel 5.8 + Vue
- Laravel 5.7 + Vue SPA
# Setup Laravel 5.8 version
composer create-project --prefer-dist laravel/laravel blog "5.8.*"Sau khi setup xong, ta chạy câu lệnh: npm install
Sau khi chạy câu lệnh npm install, ta tiếp tục chạy câu lệnh cài đặt vue-router như sau:
npm install --save vue-router # Installing Auth in Laravel
php artisan make:AuthMình cài đặt xác thuật Authentication trong Laravel nhé các bạn, để đăng nhập xong ta có quyền đăng bài viết
Sau khi bạn chạy câu lệnh bên trên sẽ tạo ra một thư mục mới tại đường dẫn resources/views/auth sẽ chứa các file của authentication
Đồng thời tạo cho ta một file HomeController.php trong thư mục App/Http/Component/HomeComment.php
# Download Ckeditor & Ckfinder
Tiếp theo ta cần download Ckeditor & Ckfinder về, ở đây mình dùng Ckeditor version 4 và Ckfinder Version 3
Ckeditor:https://ckeditor.com/ckeditor-4/download/
Ckfinder:https://ckeditor.com/ckfinder/download/
Sau khi download xong ,giản nén chúng để vào thư mục public/ và sẽ có đường dẫn như sau:
public/ckeditor và public/ckfinder
giờ ta add ckfinder đến ckeditor như sau: mở file config.js trong folder public/ckeditor và chỉnh lại như đoạn code bên dưới đây
CKEDITOR.editorConfig = function( config ) {
	// Define changes to default configuration here. For example:
	// config.language = 'fr';
    // config.uiColor = '#AADC6E';
   //  config.extraPlugins = 'cloudservices';
        config.removePlugins = 'easyimage, cloudservices';

	    config.filebrowserBrowseUrl = '/ckfinder/ckfinder.html';

        config.filebrowserImageBrowseUrl = '/ckfinder/ckfinder.html?type=Images';

        config.filebrowserFlashBrowseUrl = '/ckfinder/ckfinder.html?type=Flash';

        config.filebrowserUploadUrl = '/ckfinder/core/connector/php/connector.php?command=QuickUpload&type=Files';

        config.filebrowserImageUploadUrl = '/ckfinder/core/connector/php/connector.php?command=QuickUpload&type=Images';

        config.filebrowserFlashUploadUrl = '/ckfinder/core/connector/php/connector.php?command=QuickUpload&type=Flash';


};
Vậy là ta đã add được ckfinder đến Ckeditor rồi, hồi chúng ta sẽ thử nghiệm sau
# Create Component in Vue
Vào thư mục resources/js tạo file Main.vue và copy đoạn code sau, <router-view> được dùng load các component trong Vue
<template>
    <div>
        <router-view></router-view>
    </div>
</template>
<script>
export default {

}
</script>
Tiếp tục ta tạo file CkeditorComponent.vue trong đường dẫn resources/js/components và copy đoạn code bên dưới vào file
<template>
    <div>
        <textarea class="editor" id="editor"></textarea>
    </div>
</template>
<script>
export default {
    data(){
        return {}
    },
    mounted(){
         this.getCkeditor();
    },
    methods:{
        getCkeditor(){
            CKEDITOR.replace('editor');
        }
    }
}
</script>
Đoạn code bên trên ta tạo thẻ <textarea></textarea> để gọi Ckeditor, CKEDITOR.replace('editor') ta dùng gọi thư viện Ckeditor của ta
Sau khi tạo xong ta cần add hai Component vừa tạo vào file app.js tại đường dẫn resources/js/app.js
/**
 * First we will load all of this project's JavaScript dependencies which
 * includes Vue and other libraries. It is a great starting point when
 * building robust, powerful web applications using Vue and Laravel.
 */

require('./bootstrap');

window.Vue = require('vue');
import Vue from 'vue'
import VueRouter from 'vue-router'
/**
 * The following block of code may be used to automatically register your
 * Vue components. It will recursively scan this directory for the Vue
 * components and automatically register them with their "basename".
 *
 * Eg. ./components/ExampleComponent.vue -> <example-component></example-component>
 */

// const files = require.context('./', true, /\.vue$/i);
// files.keys().map(key => Vue.component(key.split('/').pop().split('.')[0], files(key).default));
import Main from './Main.vue';
import CkeditorComponent from './components/CkeditorComponent.vue';
// Vue.component('example-component', require('./components/ExampleComponent.vue').default);
Vue.component('main-component',Main);

/**
 * Next, we will create a fresh Vue application instance and attach it to
 * the page. Then, you may begin adding components to this application
 * or customize the JavaScript scaffolding to fit your unique needs.
 */
Vue.use(VueRouter)

const router = new VueRouter({
    mode: 'history',
    routes: [
        {
          path:"/home",
          name:'home',
          component:CkeditorComponent
        }
    ]
});
const app = new Vue({
    el: '#app',
    router,
    Main
});
Ở trên mình import các component vào file app.js, các bạn chú ý xem Vue.component('main-component',Main); hồi mình đưa chúng vào file home.blade.php trong đường dẫn views/home.blade.php
# Configuration View Blade
Ta hãy mở file home.blade.php trong đường dẫn views/home.blade.php và chỉnh sửa như sau
@extends('layouts.app')

@section('content')
<div class="container">
    <div class="row justify-content-center">
        <div class="col-md-8">
            <div class="card">
                <div class="card-header">Dashboard</div>

                <div class="card-body">
                    @if (session('status'))
                        <div class="alert alert-success" role="alert">
                            {{ session('status') }}
                        </div>
                    @endif

                    <main-component></main-component>
                </div>
            </div>
        </div>
    </div>
</div>
@endsection
Ta add <main-component></main-component> vào trong file home.blade.php để load Vue
# Test Ckeditor & Ckfinder in Laravel 5.8
Đầu tiên chạy câu lệnh biên dịch Vue
npm run watch
Tiếp theo chạy: php artisan serve


