Cũng lâu rồi không viết một bài nào gây cảm hứng, nay mình chia sẽ với các bạn, cách kết hợp giữa NodeJS + VueJS để tạo một ứng dụng Chat chơi nhé, và nữa bạn làm được trong hướng dẫn của mình, bạn có thể phát triển thêm theo ý bạn chẳng hạn như, connect nhiều user vô group chat,...
Nếu bạn chưa hiểu sự kết hợp và cài đặt NodeJS + VueJS bạn có thể xem lại bài viết sau đây:HƯỚNG DẪN KẾT HỢP NODEJS + VUEJS bạn có thể xem và làm theo, vì trong bài viết này mình cũng làm tương tự như vậy với các bước cũng giống vậy chỉ khác một chổ là mình có cài thêm Socket.io vào module nodejs để gọi thư viện socket trong ứng dụng.
Bước 1: Bạn tạo project thư mục chat-nodejs-vuejs và chạy câu lệnh: npm init để tạo package.json
Bước 2:Bạn copy cái package.json bên dưới đậy để thay đổi lại cái package.json mới tạo ban đâu, sau khi save lại bạn chạy câu lệnh: npm install để cài đặt tất cả các thư viện trong package.json đã khai bao
{
  "name": "chat-nodejs-vuejs",
  "version": "1.0.0",
  "description": "",
  "main": "index.js",
  "scripts": {
    "start": "webpack-dev-server"
  },
  "author": "skipperhoa",
  "license": "ISC",
  "devDependencies": {
    "axios": "^0.16.2",
    "babel-core": "^6.25.0",
    "babel-loader": "^7.1.1",
    "babel-plugin-transform-runtime": "^6.23.0",
    "babel-preset-es2015": "^6.24.1",
    "babel-preset-stage-3": "^6.24.1",
    "babel-runtime": "^6.25.0",
    "css-loader": "^0.28.4",
    "file-loader": "^0.11.2",
    "vue": "^2.4.2",
    "vue-router": "^2.7.0",
    "vue-axios": "^2.0.2",
    "vue-loader": "^13.0.2",
    "vue-template-compiler": "^2.4.2",
    "webpack": "^3.4.1",
    "webpack-dev-server": "^2.6.1"
  },
  "dependencies": {
    "body-parser": "^1.18.2",
    "cors": "^2.8.4",
    "express": "^4.16.3",
    "jsonfile": "^4.0.0",
    "mongoose": "^5.0.12",
    "multer": "^1.3.0",
    "nodemon": "^1.17.2",
    "socket.io": "^2.1.0"
  }
}
Các bước chuẩn bị đã hoàn thành giờ ta đi vào tạo từng file cho ứng dụng thôi nào! chuẩn bị một ly cafe ngồi uống và code cho phê nhé! ::)
Cấu trúc thư mục project như sau, bạn có thể nhìn vào tạo theo nhé
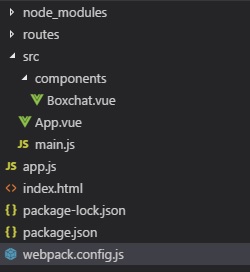
+ Bạn tạo một thư mục src/components trong project chat-nodejs-vuejs bạn vừa tạo ban đầu,để tạo một file Boxchat.vue nằm trong thư mục components
<style>
    #box-chat{
        margin-top:10px;
    }
    .show-message{
        width:100%;
        border:1px solid #ccc;
        height:300px;
        padding:10px;
        box-sizing:border-box;
    }
    #btnChat{
        width:100%;

    }

    .sms-1{

       padding:5px;
       margin:2px 0px;
        box-sizing:border-box;
        border:1px solid #ccc;
        clear:both;
        float:left;
    }
    .username{
        color:red;
        font-weight:bold;
    }
</style>
<template>
    <div class="row" id="box-chat">
        <div class="col-md-2"></div>
        <div class="col-md-8">
            <img src="https://hoanguyenit.com/public/img/logo33.png"/>
            <div class="alert alert-success">
                {{title}}
            </div>
            <div class="show-message">


            </div>
            <form action="http://localhost:3000/" method="post">
                <div class="form-group">
                    <label>Username</label>
                    <input type="text" class="form-control" placeholder="Enter username" id="user"/>
                </div>
                <div class="form-group">
                    <label>Message</label>
                    <input type="text" class="form-control" placeholder="Enter message" id="message"/>
                </div>
                <div class="form-group">
                    <button type="submit" class="btn btn-danger" id="btnChat">Send Message</button>
                </div>
            </form>


        </div>
        <div class="col-md-2"></div>
    </div>
</template>
<script>
    export default{
        data(){
            return{
                title:"Form chat Nodejs + Vuejs"
            }
        }
    }

</script>
+ Bước tiếp theo bạn ra ngoài thư mục src. Để tạo file (main.js,App.vue) , bạn copy source bên dưới và dán vào nhé
source App.vue
<template>
    <div class="container">
        <div>
            <transition name="fade">
                <router-view></router-view>
            </transition>
        </div>
    </div>
</template>

<style>
    .fade-enter-active, .fade-leave-active {
      transition: opacity .5s
    }
    .fade-enter, .fade-leave-active {
      opacity: 0
    }
</style>

<script>

    export default{
    }
</script>
Source main.js
import Vue from 'vue'
import VueRouter from 'vue-router'
import VueAxios from 'vue-axios';
import axios from 'axios';
Vue.use(VueAxios,axios);

//import template vuejs
import App from './App.vue';
import Boxchat from './components/Boxchat.vue';
Vue.use(VueRouter)
const routes = [
  {
        name: 'Boxchat',
        path: '/',
        component: Boxchat
    },

];
const router = new VueRouter({ mode: 'history', routes: routes});
new Vue(Vue.util.extend({ router }, App)).$mount('#app');
Nếu các bạn không hiểu các file như( main.js và App.vue) có tác dụng gì bạn có thể xem lại bài hướng dẫn trước mình đã hướng dẫn nhé.
Tiếp tục để chạy được Vuejs bạn cần phải tạo một cái webpack.config.js nằm cùng cấp với thư mục project của bạn nhé, bạn copy source bên dưới và dán vào file webpack.config.js vừa tạo nhé
// webpack.config.js
module.exports = {
    // This is the "main" file which should include all other modules
    entry: './src/main.js',
    // Where should the compiled file go?
    output: {

      filename: 'bundle.js'
    },
    resolve: {
    alias: {
      vue: 'vue/dist/vue.js'
    }
  },
    module: {
      // Special compilation rules
      loaders: [
        {
          // Ask webpack to check: If this file ends with .js, then apply some transforms
          test: /\.js$/,
          // Transform it with babel
          loader: 'babel-loader',
          // don't transform node_modules folder (which don't need to be compiled)
          exclude: /node_modules/
        },
        {
          // Ask webpack to check: If this file ends with .vue, then apply some transforms
          test: /\.vue$/,
          // don't transform node_modules folder (which don't need to be compiled)
          exclude: /(node_modules|bower_components)/,
          // Transform it with vue
        use: {
          loader: 'vue-loader'
        }
      }
    ]
  },
  devServer: {
         port: 3000
     }
  }
Tiếp tục bạn tạo cho mình một file index.html nằm cùng cấp với project nhé, bạn có thể kéo lên và xem lại cấu trúc thư mục project của mình và tạo giống vậy nhé
Source index.html
<!DOCTYPE html>
<html>
  <head>
    <meta charset="utf-8">
    <title>VueJS NodeJS and Express example</title>
    <link rel="stylesheet" href="https://maxcdn.bootstrapcdn.com/bootstrap/3.3.7/css/bootstrap.min.css" integrity="sha384-BVYiiSIFeK1dGmJRAkycuHAHRg32OmUcww7on3RYdg4Va+PmSTsz/K68vbdEjh4u" crossorigin="anonymous">
    <script src="http://localhost:8888/socket.io/socket.io.js"></script>
    <script src="https://code.jquery.com/jquery-1.11.1.js"></script>
    <script>
    $(function () {
        var socket = io.connect("http://localhost:8888");
        $('form').submit(function(event){
             event.preventDefault();
             var data = {
                 user:$("#user").val(),
                 message:$("#message").val()
             }
             socket.emit('data-message', data);
        });
        socket.on('send-message', function(msg){

            var chuoi ='<span class="sms-1"><i class="username">'+msg.user+'</i>:'+msg.message+'</span>';
            $('.show-message').append(chuoi);
        });
    });
    </script>
</head>
  <body>
    <div id="app"></div>
    <script src="bundle.js"></script>
  </body>
</html>
Các bạn để ý tới cái phần mình gọi thư viện Socket.io nhé mình đưa port kết nói của nodejs vô luôn nhé, vì hồi mình sẽ chạy 2 cái serve là của Nodejs và Vuejs có 2 cổng khác nhau, nếu bạn không để port là nó sẽ báo lỗi nhé
Socket.on nó có tác dụng nó nhận bên phía server trả về và lúc đó bạn có thể hiện lên màn hình cho người dùng xem
Socket.emit có tác dụng bạn gửi dữ liệu về server để serve xử lý, và cũng đồi hỏi bên phía server cũng phải có một socket chấp nhận connect từ dữ liệu được client gửi về phía server.
Giờ là bước quan trọng đễ chạy được nodejs chúng ta cần phải tạo một file để chạy NodeJS , giờ bạn tạo cho mình file app.js và copy source bên dưới dán vào nhé!
Source app.js
var express = require('express');
var app = express();
var bodyParser = require('body-parser');
var http = require('http').Server(app);
var io = require('socket.io')(http);
app.use(bodyParser.json());

io.on('connection',function(socket){
    socket.on('data-message',function(msg){
        var data = {
            user: msg.user,
            message:msg.message
        }
       io.emit('send-message', data);
    });
});

http.listen(process.env.PORT || 8888, function(){
    console.log('listening on *:8888');
});
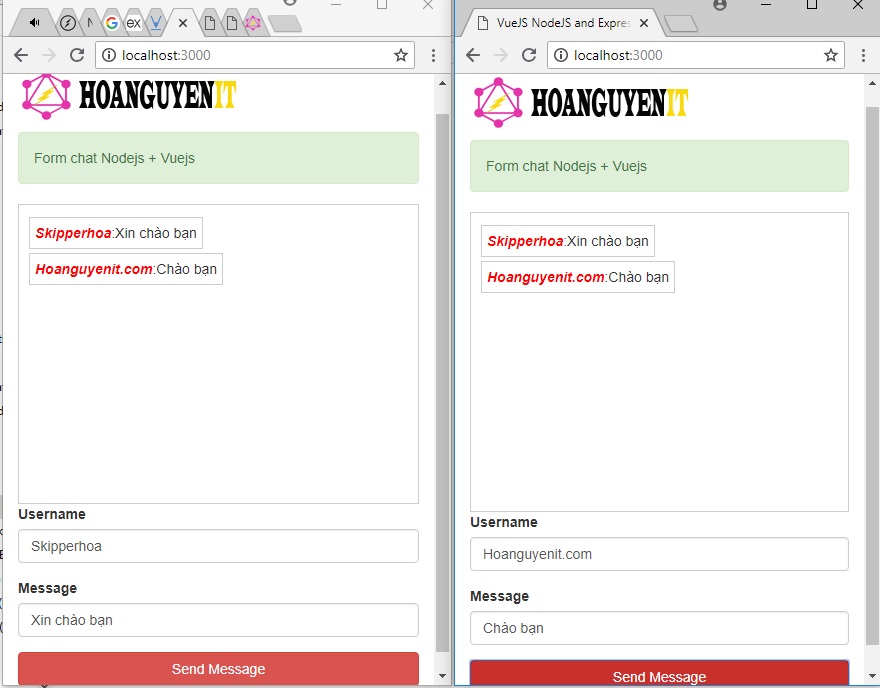
Giờ mình đã tạo xong các bước để chạy nodejs và vuejs, giờ bạn có thể chạy và thưởng thụ cảm giác hứng thứ về tốc độ của nodejs cùng với sự kết hợp với Vuejs sẽ là một điều rất tuyệt vời, giờ còn chờ gì nữa chạy thôi nào!
Bước 1: khởi động Vuejs trước bằng câu lệnh: npm start
Bước 2: khởi động chạy Nodejs bằng câu lệnh: node app.js
bạn sẽ thấy như sau khi chạy 2 câu lệnh trên:
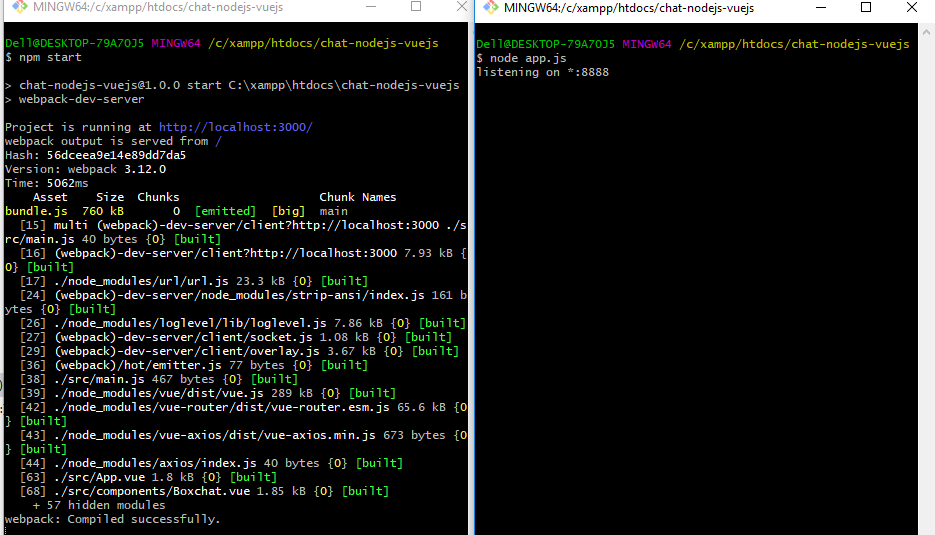
Sau khi bạn thấy đã báo successfuly bạn có thể gõ câu lệnh trên trình duyệt website như sau:http://localhost:3000
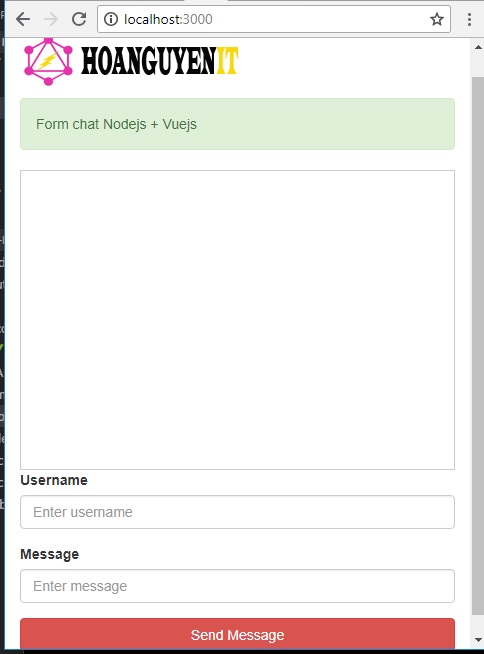
Bạn nhớ là Vuejs chạy port:3000 còn Nodejs chạy port:8888 nhé
Chúc các bạn làm thành công nhé! hẹn mọi người với chia sẽ kiến thức tiếp theo!